Honeysmoke Lesson Plan by Kirah Johnson
Integrate art, reading, and social studies.
VA:Cr1.2.1a Use observation and investigation in preparation for making a work of art.
VA:Cr2.1.1a Explore uses of materials and tools to create works of art or design.
VA:Re.7.2.1a Compare images that represent the same subject.
Today students will read a book about skin tone, discuss the terms "black and white" while referencing a color wheel, and finally mix paint and add nature to make an accurate portrait of themselves.
By the end of the lesson, students will be able to invent a new term (like honeysmoke) to define the color of their skin.
Part 1: Read and Discuss:
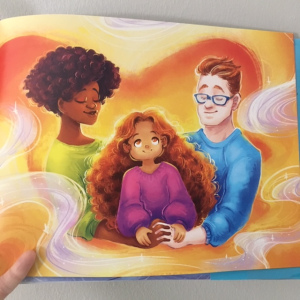
1. Read the book "Honeysmoke" by Monique Fields aloud. Do not show the cover or title to students. Pause frequently to discuss connections students may have. (Black mother, White father, going to school for the first time, etc.)
2. Pause whenever Simone makes a claim about someone being Black or White. Hold up a greyscale and a color wheel and ask for a student to come point to white. Then ask another student to point to the color of the dad's skin. Discuss: why are they not the same? Why do we call people white or black if that's not an accurate description?
3. Discuss: Simone needs a name for her color - something that describes the the mix of her parents. How could she describe warm honey like her mom and train smoke like her dad?
4. As the book concludes, there are many other made-up skin tone names at the back. (bronze leaf, sun quartz, etc.). Students will turn and talk: how could you describe my (the teacher's) skin? Discuss as a whole group after a few minutes.
Part 2: Create a Skin Tone Face
1. Give each child a white piece of a paper and a black sharpie. Model how to draw a u-shape to make a face. Model how to draw the outline of eyes, a nose, and a mouth. Collect the sharpies.
2. Give each chidl a paper plate with white paint, brown paint, black paint, and small amounts of red and yellow.
3. Model how to mix small amount of the darker colors into the white to create their own skin tone. Remind them to always start with white for this mixing project because once the color goes too dark it's tricky to lighten.
4. Students will check the mix they've made against their own skin to see how close they can make the match.
5. Students will paint their self portrait face.
6. Let dry
7. Outline again in sharpie.
8. Have students create a term for the skin tone they've made (ie: honeysmoke). Write the label on the paper.
Part 3: Add leaves for hair.
-ahead of time, have students gather leaves of many colors from the playground (best to do this activity in fall)
1. Spread out leaves on a tarp at the front of the classroom.
2. Ask students to grab 5 or 6 leaves at a time and come back when they're ready for more.
3. Model "painting" the leaves with glue and pressing them down to help them stick. Show pictures of different hair styles (braids, pony tail, short hair, etc.) and discuss how you could create that look with leaves.
4. Students create their hair.
5. Let dry.
Part 4: Display (optional)
Create a bulletin board display of all the faces. Ask students to come up with a term that could describe the whole class (ie: Nature Rainbow)

